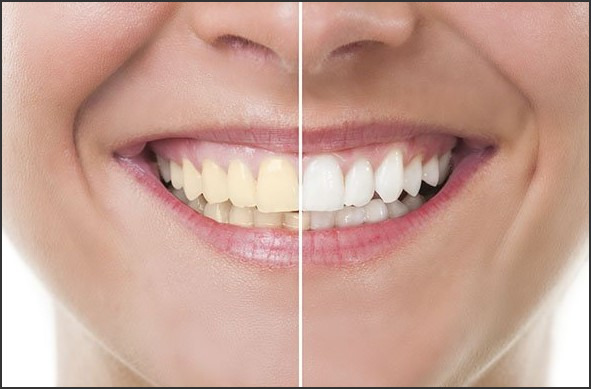
Having yellowish teeth can be embarrassing and make you feel self-conscious about your smile. Fortunately, there are a variety of treatments available to help you get a brighter, whiter smile. From professional whitening treatments to at-home remedies, there are many ways to improve the appearance of your teeth. In this article, we will discuss some of the most effective yellowish teeth treatment options and tips for a brighter smile.
How to Treat Yellowish Teeth: A Comprehensive Guide to Brightening Your Smile
Having yellowish teeth can be embarrassing and make you feel self-conscious about your smile. Fortunately, there are a variety of treatments available to help you brighten your teeth and restore your confidence. This comprehensive guide will provide you with the information you need to understand the causes of yellow teeth and the treatments available to help you achieve a brighter, whiter smile.
What Causes Yellow Teeth?
The most common cause of yellow teeth is poor oral hygiene. When plaque and tartar build up on the teeth, they can cause discoloration. Other factors that can contribute to yellow teeth include smoking, drinking coffee or tea, and certain medications. Age can also play a role in the discoloration of teeth, as the enamel wears away over time, revealing the yellowish dentin underneath.
Treatments for Yellow Teeth
The best way to treat yellow teeth is to practice good oral hygiene. This includes brushing your teeth twice a day with a fluoride toothpaste, flossing daily, and using a mouthwash. Regular dental checkups and professional cleanings can also help to remove plaque and tartar buildup.
If your yellow teeth are caused by staining, there are a variety of whitening treatments available. Over-the-counter whitening products, such as whitening toothpastes and strips, can help to remove surface stains. Professional whitening treatments, such as in-office bleaching or take-home whitening kits, can provide more dramatic results.
If your yellow teeth are caused by age or medications, veneers or crowns may be recommended. Veneers are thin shells of porcelain that are bonded to the front of the teeth, while crowns are caps that cover the entire tooth. Both treatments can help to restore the natural color of your teeth.
Conclusion
Having yellow teeth can be embarrassing, but there are treatments available to help you achieve a brighter, whiter smile. Good oral hygiene is the best way to prevent yellow teeth, but if your teeth are already discolored, there are a variety of whitening treatments available. If your yellow teeth are caused by age or medications, veneers or crowns may be recommended. With the right treatment, you can restore your confidence and enjoy a beautiful, healthy smile.
Natural Remedies for Yellowish Teeth: Simple Tips for a Whiter Smile
Having yellowish teeth can be embarrassing and can make you feel self-conscious about your smile. Fortunately, there are some simple natural remedies that can help you get a whiter smile. Here are some tips to help you get started.
1. Brush your teeth twice a day with a whitening toothpaste. Whitening toothpastes contain special ingredients that help to remove surface stains and brighten your teeth.
2. Use a whitening mouthwash. Whitening mouthwashes contain special ingredients that help to remove surface stains and brighten your teeth.
3. Eat crunchy fruits and vegetables. Eating crunchy fruits and vegetables like apples, celery, and carrots can help to scrub away surface stains and brighten your teeth.
4. Try oil pulling. Oil pulling is an ancient practice that involves swishing oil around in your mouth for several minutes. It helps to remove bacteria and toxins from your mouth, which can help to whiten your teeth.
5. Use baking soda. Baking soda is a natural whitening agent that can help to remove surface stains and brighten your teeth.
6. Avoid foods and drinks that stain. Foods and drinks like coffee, tea, and red wine can stain your teeth. Try to limit your consumption of these items to help keep your teeth looking white.
By following these simple tips, you can help to naturally whiten your teeth and get a brighter, whiter smile.In conclusion, yellowish teeth can be treated with a variety of methods. Brushing and flossing regularly, using whitening toothpaste, and avoiding certain foods and drinks can help to reduce the discoloration of teeth. Additionally, professional whitening treatments can be used to achieve a brighter smile. With the right treatment plan, yellowish teeth can be improved and a brighter smile can be achieved.