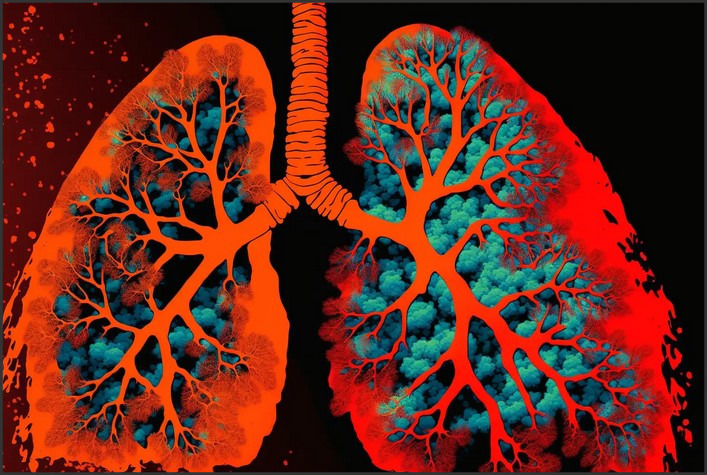
Swollen Knuckle on Middle Finger: Causes and Management

Swollen knuckle on the middle finger is a common condition that can be caused by a variety of factors. It can be caused by an injury, infection, or underlying medical condition. It can also be caused by repetitive motions or activities. Swollen knuckle on the middle finger can be painful and can limit movement. Treatment for swollen knuckle on the middle finger depends on the underlying cause. Treatment options may include rest, ice, compression, elevation, medications, and physical therapy. In some cases, surgery may be necessary. This article will discuss the causes and management of swollen knuckle on the middle finger.

What Causes Swollen Knuckles on the Middle Finger and How Can It Be Managed?

Swollen knuckles on the middle finger can be caused by a variety of conditions, including arthritis, gout, and trauma. Arthritis is a condition that causes inflammation of the joints, which can lead to swelling and pain. Gout is a type of arthritis that is caused by a buildup of uric acid in the joints, which can cause swelling and pain. Trauma to the finger can also cause swelling and pain, such as a sprain or fracture.

In order to manage swollen knuckles on the middle finger, it is important to identify the underlying cause. If the swelling is due to arthritis or gout, medications such as nonsteroidal anti-inflammatory drugs (NSAIDs) may be prescribed to reduce inflammation and pain. Physical therapy may also be recommended to help strengthen the muscles and joints around the affected area. If the swelling is due to trauma, rest and immobilization of the finger may be necessary. Ice and elevation can also help reduce swelling and pain.

In some cases, surgery may be necessary to treat swollen knuckles on the middle finger. This may involve removing damaged tissue or repairing a fracture. It is important to speak with a doctor to determine the best course of treatment for the condition.

Understanding the Symptoms and Treatment Options for Swollen Knuckles on the Middle Finger

Swollen knuckles on the middle finger can be a painful and uncomfortable condition. It is important to understand the symptoms and treatment options available to help manage the condition.

Symptoms

The most common symptom of swollen knuckles on the middle finger is pain and tenderness in the affected area. The knuckle may also appear red and swollen, and may be warm to the touch. In some cases, the knuckle may be difficult to move or bend.

Treatment Options

Treatment for swollen knuckles on the middle finger will depend on the underlying cause. If the swelling is due to an injury, such as a sprain or strain, rest and ice can help reduce the swelling and pain. Over-the-counter pain medications, such as ibuprofen or acetaminophen, can also help manage the pain.

If the swelling is due to an underlying medical condition, such as arthritis, treatment may involve medications to reduce inflammation and pain. Physical therapy may also be recommended to help strengthen the muscles and joints in the affected area.

In some cases, surgery may be necessary to repair any damage to the joint or to remove any bone spurs that may be causing the swelling.

It is important to speak to a doctor if you are experiencing swollen knuckles on the middle finger. They can help diagnose the underlying cause and recommend the best treatment plan for your individual needs.

Conclusion

In conclusion, swollen knuckle on the middle finger can be caused by a variety of factors, including injury, arthritis, and infection. Treatment for swollen knuckle on the middle finger depends on the underlying cause and may include rest, ice, compression, elevation, medications, and physical therapy. If the swelling persists or worsens, it is important to seek medical attention to ensure proper diagnosis and treatment.

Do Carpenter Bees Sting or Bite? Differentiating Carpenter Bee Behavior

Carpenter bees are a type of bee that can be found in many parts of the world. They are often mistaken for bumblebees due to their similar size and coloring. While they may look similar, carpenter bees have a very different behavior than bumblebees. One of the most common questions people have about carpenter bees is whether or not they sting or bite. This article will discuss the behavior of carpenter bees and explain the differences between stinging and biting. It will also provide tips on how to protect yourself from carpenter bee stings and bites.

Exploring the Difference Between Carpenter Bee Stings and Bites: What You Need to Know

When it comes to carpenter bees, it is important to understand the difference between a sting and a bite. While both can be painful, they are two very different experiences. Knowing the difference between the two can help you take the necessary steps to protect yourself and your family from potential harm.

A carpenter bee sting occurs when the bee injects venom into the skin. This venom is a combination of proteins and enzymes that can cause pain, swelling, and itching. The sting itself is usually not dangerous, but it can be very painful. The area around the sting may become red and swollen, and the pain can last for several hours.

A carpenter bee bite, on the other hand, is much more serious. This occurs when the bee actually bites into the skin and injects venom. This venom is much more potent than the venom from a sting and can cause severe pain, swelling, and itching. In some cases, the bite can even cause an allergic reaction.

It is important to note that carpenter bees are not aggressive and will only sting or bite if they feel threatened. If you encounter a carpenter bee, it is best to remain calm and slowly move away from the area. If you are stung or bitten, it is important to seek medical attention as soon as possible.

In conclusion, it is important to understand the difference between a carpenter bee sting and a bite. While both can be painful, a sting is usually not dangerous and can be treated with over-the-counter medications. A bite, however, is much more serious and can cause an allergic reaction. If you are stung or bitten, it is important to seek medical attention as soon as possible.

How to Identify Carpenter Bee Behavior and Avoid Being Stung or Bitten

Carpenter bees are large, black and yellow bees that are commonly found in North America. While they are not typically aggressive, they can sting or bite if they feel threatened. To avoid being stung or bitten, it is important to understand the behavior of carpenter bees and how to identify them.

Carpenter bees are solitary bees, meaning they do not live in colonies like honeybees. They are most active during the day and can be seen hovering around wood structures, such as decks, sheds, and fences. They are attracted to wood because they use it to build their nests. Carpenter bees bore into wood to create tunnels for their eggs and larvae.

Carpenter bees can be identified by their size and color. They are typically black and yellow and can grow up to an inch in length. They also have a shiny abdomen and a fuzzy thorax.

To avoid being stung or bitten by a carpenter bee, it is important to avoid disturbing them. If you see a carpenter bee, do not approach it or try to swat it away. Instead, move away slowly and calmly. If you are near a wood structure, be sure to check for signs of carpenter bee activity, such as sawdust or holes in the wood. If you find any, it is best to leave the area and contact a pest control professional.

By understanding the behavior of carpenter bees and how to identify them, you can avoid being stung or bitten. Remember to stay calm and avoid disturbing them, and if you find signs of carpenter bee activity, contact a pest control professional.

Conclusion

In conclusion, carpenter bees do not sting or bite humans. However, they can be a nuisance due to their loud buzzing and wood-boring habits. It is important to differentiate between carpenter bee behavior and that of other bees, such as honeybees, which do sting and bite. By understanding the differences between carpenter bees and other bees, you can better protect yourself and your property from potential damage.

Compassion Fatigue Symptoms: Recognizing the Signs of Caregiver Burnout

Compassion fatigue is a condition that affects caregivers, such as nurses, doctors, social workers, and other professionals who provide care to others. It is a state of physical, emotional, and mental exhaustion that can occur when caring for someone who is suffering from a traumatic event or illness. Compassion fatigue can lead to burnout, which can have serious consequences for both the caregiver and the person they are caring for. Recognizing the signs of compassion fatigue and taking steps to prevent it is essential for caregivers to maintain their health and well-being. This article will discuss the symptoms of compassion fatigue and provide tips for recognizing and managing it.

Understanding the Physical and Emotional Symptoms of Compassion Fatigue

Compassion fatigue is a condition that can affect those who work in the helping professions, such as healthcare workers, social workers, and counselors. It is a state of physical, emotional, and spiritual exhaustion that can occur when a person is exposed to a large amount of suffering and distress. It is important to understand the physical and emotional symptoms of compassion fatigue in order to recognize it and take steps to prevent it.

Physical symptoms of compassion fatigue can include fatigue, headaches, muscle tension, and difficulty sleeping. Other physical symptoms may include digestive issues, such as nausea, stomach pain, and loss of appetite.

Emotional symptoms of compassion fatigue can include feelings of sadness, hopelessness, and apathy. People may also experience feelings of guilt, anger, and irritability. They may also feel overwhelmed and unable to cope with the demands of their job.

Compassion fatigue can have a serious impact on a person’s mental and physical health. It is important to recognize the signs and symptoms of compassion fatigue and take steps to prevent it. This can include taking regular breaks, engaging in self-care activities, and seeking professional help if needed.

How to Manage Compassion Fatigue and Avoid Caregiver Burnout

Compassion fatigue and caregiver burnout are two of the most common issues faced by those in the caregiving profession. Compassion fatigue is a state of physical, emotional, and mental exhaustion caused by prolonged exposure to emotionally demanding situations. Caregiver burnout is a state of physical, emotional, and mental exhaustion caused by prolonged stress and lack of support. Both of these conditions can have a serious impact on the quality of care provided and can lead to long-term health problems.

Fortunately, there are steps that can be taken to manage compassion fatigue and avoid caregiver burnout. The first step is to recognize the signs and symptoms of both conditions. Compassion fatigue can manifest itself in physical, emotional, and mental exhaustion, as well as feelings of apathy, detachment, and hopelessness. Caregiver burnout can manifest itself in physical, emotional, and mental exhaustion, as well as feelings of frustration, anger, and resentment.

Once the signs and symptoms of compassion fatigue and caregiver burnout have been identified, it is important to take steps to address them. This can include taking regular breaks, engaging in self-care activities, and seeking out support from family, friends, and colleagues. It is also important to set boundaries and prioritize tasks in order to avoid becoming overwhelmed.

Finally, it is important to recognize the importance of self-compassion. Self-compassion involves treating oneself with kindness and understanding, even in difficult situations. It is important to remember that it is normal to experience compassion fatigue and caregiver burnout, and that it is possible to manage these conditions with the right strategies.

By recognizing the signs and symptoms of compassion fatigue and caregiver burnout, taking steps to address them, and practicing self-compassion, it is possible to manage these conditions and avoid long-term health problems.

Conclusion

compassion fatigue symptoms can be difficult to recognize, but it is important to be aware of the signs of caregiver burnout. If you are feeling overwhelmed, exhausted, or disconnected from your work, it is important to take steps to address these feelings and seek help if needed. Compassion fatigue can have serious consequences for both the caregiver and the person they are caring for, so it is important to take steps to prevent and manage it.

Aerobics vs. Cardio: Which Is Right for Your Fitness Goals?

Aerobics and cardio are two of the most popular forms of exercise. Both are great for improving your overall health and fitness, but they have different benefits and can be used to achieve different goals. In this article, we will discuss the differences between aerobics and cardio, and how to decide which one is right for your fitness goals. We will also look at the benefits of each type of exercise and how to incorporate them into your workout routine.

Exploring the Benefits of Aerobics and Cardio: What’s Right for You?

Aerobics and cardio are two popular forms of exercise that can help you stay fit and healthy. Both offer a range of benefits, but which one is right for you? In this article, we’ll explore the differences between aerobics and cardio, and discuss the benefits of each.

Aerobics is a form of exercise that combines rhythmic movements with music. It typically involves a combination of aerobic exercises, such as running, jumping, and stretching. Aerobics classes are usually led by an instructor who guides participants through a series of movements. The intensity of the workout can vary depending on the type of class and the instructor’s style.

Cardio, on the other hand, is a form of exercise that focuses on increasing your heart rate and breathing rate. It can include activities such as running, cycling, swimming, and walking. Cardio can be done alone or with a group, and the intensity of the workout can be adjusted to suit your fitness level.

Both aerobics and cardio offer a range of benefits. Aerobics can help improve your cardiovascular health, strengthen your muscles, and increase your flexibility. It can also help you burn calories and lose weight. Cardio, meanwhile, can help you build endurance, improve your heart health, and reduce your risk of certain diseases.

When deciding which type of exercise is right for you, it’s important to consider your fitness goals and lifestyle. If you’re looking for a fun way to stay fit, aerobics may be the right choice. If you’re looking for a more intense workout, cardio may be a better option. Ultimately, the best type of exercise for you is the one that you enjoy and can stick with.

In conclusion, aerobics and cardio are both great forms of exercise that can help you stay fit and healthy. Each offers a range of benefits, so it’s important to consider your fitness goals and lifestyle when deciding which one is right for you. With the right approach, you can find an exercise routine that works for you and helps you reach your fitness goals.

Comparing Aerobics and Cardio: Which Is Best for Your Fitness Goals?

When it comes to achieving your fitness goals, it can be difficult to decide which type of exercise is best for you. Aerobics and cardio are two popular forms of exercise that can help you reach your goals, but they are not the same. In order to determine which is best for you, it is important to understand the differences between the two.

Aerobics is a form of exercise that involves rhythmic movements and is often done to music. It is designed to increase your heart rate and breathing rate, and can help you burn calories and improve your cardiovascular health. Examples of aerobic activities include running, swimming, and dancing.

Cardio, on the other hand, is a form of exercise that is designed to increase your heart rate and breathing rate for an extended period of time. It is often done at a steady pace and can include activities such as walking, jogging, and cycling.

When deciding which type of exercise is best for you, it is important to consider your fitness goals. If you are looking to lose weight, then aerobics may be the best option as it can help you burn more calories. If you are looking to improve your cardiovascular health, then cardio may be the better choice as it can help you increase your endurance.

Ultimately, the best type of exercise for you will depend on your individual goals and preferences. Both aerobics and cardio can be beneficial for your health and fitness, so it is important to find the type of exercise that works best for you.

Conclusion

Overall, both aerobics and cardio can be beneficial for achieving fitness goals. Aerobics can help build strength and endurance, while cardio can help improve cardiovascular health and burn calories. Ultimately, the best type of exercise for any individual depends on their fitness goals and preferences. It is important to consult with a doctor or fitness professional to determine the best type of exercise for an individual’s needs.

Is Aloe Good for Hair? Benefits of Aloe Vera in Hair Care

Aloe vera is a natural ingredient that has been used for centuries to treat a variety of skin and hair conditions. It is known for its healing and moisturizing properties, and is often used in hair care products. Aloe vera is rich in vitamins, minerals, and amino acids, which can help to nourish and strengthen the hair. It can also help to reduce scalp irritation, dandruff, and dryness. In addition, aloe vera can help to protect the hair from environmental damage, and can even promote hair growth. In this article, we will discuss the benefits of aloe vera in hair care, and how to use it for best results.

How Aloe Vera Can Help Restore Damaged Hair and Promote Healthy Hair Growth

Aloe vera is a natural ingredient that has been used for centuries to promote healthy hair growth and restore damaged hair. It is rich in vitamins, minerals, and antioxidants that nourish the scalp and hair follicles, helping to promote healthy hair growth. Additionally, aloe vera has natural anti-inflammatory and antiseptic properties that can help to soothe an irritated scalp and reduce inflammation.

Aloe vera can help to restore damaged hair by providing essential nutrients and moisture. It is rich in vitamins A, C, and E, which are essential for healthy hair growth. Additionally, aloe vera contains enzymes that help to break down dead skin cells on the scalp, allowing for better absorption of nutrients. This helps to promote healthy hair growth and reduce hair loss.

Aloe vera also contains proteolytic enzymes that help to repair damaged hair follicles. These enzymes help to break down the proteins in the hair, allowing for better absorption of nutrients. This helps to strengthen the hair follicles and promote healthy hair growth.

Aloe vera also contains fatty acids that help to nourish the scalp and hair follicles. These fatty acids help to keep the scalp hydrated and reduce dryness, which can lead to hair breakage. Additionally, aloe vera helps to reduce dandruff and other scalp conditions that can lead to hair loss.

Finally, aloe vera helps to protect the hair from environmental damage. It contains antioxidants that help to protect the hair from free radical damage, which can lead to hair breakage and thinning. Additionally, aloe vera helps to protect the hair from UV damage, which can cause dryness and breakage.

In conclusion, aloe vera is a natural ingredient that can help to restore damaged hair and promote healthy hair growth. It is rich in vitamins, minerals, and antioxidants that nourish the scalp and hair follicles, helping to promote healthy hair growth. Additionally, aloe vera has natural anti-inflammatory and antiseptic properties that can help to soothe an irritated scalp and reduce inflammation. Finally, aloe vera helps to protect the hair from environmental damage, helping to keep it healthy and strong.

The Benefits of Aloe Vera for Hair: Moisturizing, Strengthening, and Reducing Frizz

Aloe vera is a natural ingredient that has been used for centuries to promote healthy hair. It is known for its moisturizing, strengthening, and anti-frizz properties, making it an ideal choice for those looking to improve the health of their hair.

When applied to the hair, aloe vera helps to moisturize and nourish the scalp and strands. It is rich in vitamins, minerals, and amino acids, which help to strengthen the hair and reduce breakage. Aloe vera also contains enzymes that help to remove dead skin cells from the scalp, allowing for better absorption of nutrients. This helps to promote healthy hair growth.

Aloe vera is also known for its anti-frizz properties. It helps to smooth the hair cuticles, reducing frizz and flyaways. This makes it an ideal choice for those with curly or wavy hair.

In addition to its moisturizing and strengthening properties, aloe vera also helps to protect the hair from environmental damage. It contains antioxidants that help to protect the hair from UV rays, pollution, and other environmental factors.

Aloe vera is a natural ingredient that can be used to improve the health of your hair. It helps to moisturize, strengthen, and reduce frizz, making it an ideal choice for those looking to improve the health of their hair.

Conclusion

In conclusion, Aloe Vera is an excellent natural remedy for hair care. It is packed with vitamins, minerals, and antioxidants that nourish the scalp and hair follicles. It can help to reduce dandruff, promote hair growth, and reduce hair loss. It can also help to protect the hair from environmental damage and keep it looking healthy and shiny. With regular use, Aloe Vera can help to improve the overall health of your hair.

Infant Lip Tie: Recognizing and Addressing Oral Issues in Babies

infant lip tie is a condition that affects the oral health of babies and can cause a variety of issues. It occurs when the tissue connecting the upper lip to the gum is too tight, restricting the movement of the upper lip. This can cause difficulty with breastfeeding, bottle feeding, and other oral activities. It can also lead to dental problems, such as misalignment of the teeth, and speech issues. Recognizing and addressing infant lip tie is important for the health and development of babies. This article will discuss the signs and symptoms of infant lip tie, as well as the treatments available to address it.

How to Identify an Infant Lip Tie: Signs and Symptoms

Identifying an infant lip tie can be difficult, as the signs and symptoms may not be immediately apparent. Lip ties occur when the tissue connecting the upper lip to the gum is too tight, restricting the movement of the upper lip. This can cause a variety of issues, including difficulty breastfeeding, speech impediments, and dental problems. It is important to be aware of the signs and symptoms of an infant lip tie in order to ensure that the child receives the necessary treatment.

The most common symptom of an infant lip tie is difficulty breastfeeding. If the baby is having difficulty latching onto the breast, or if the mother experiences pain while breastfeeding, this could be a sign of a lip tie. Other signs include a clicking sound when the baby is nursing, a shallow latch, and a decrease in milk supply.

In addition to difficulty breastfeeding, an infant lip tie can also cause speech impediments. If the baby is having difficulty making certain sounds, such as “s” or “th”, this could be a sign of a lip tie. Additionally, the baby may have difficulty forming words or speaking clearly.

Finally, an infant lip tie can also cause dental problems. If the baby has an overbite or an open bite, this could be a sign of a lip tie. Additionally, the baby may have difficulty closing their lips completely, or their teeth may not line up properly.

If you suspect that your baby has a lip tie, it is important to seek medical attention. A doctor or dentist can diagnose a lip tie and recommend the appropriate treatment. Treatment may include a simple procedure to release the lip tie, or more extensive treatment such as braces or surgery. It is important to seek treatment as soon as possible in order to ensure that the baby’s health and development are not affected.

Treating Infant Lip Tie: Options for Parents and Caregivers

infant lip tie is a condition in which the tissue connecting the upper lip to the gum is too tight, restricting the movement of the upper lip. This can cause difficulty with breastfeeding, as well as other issues such as speech impediments, dental problems, and difficulty with eating. Fortunately, there are several options available to parents and caregivers to treat infant lip tie.

The first option is to observe and wait. In some cases, the lip tie may resolve on its own as the baby grows. If the lip tie is mild, it may not cause any issues and may not require treatment. However, if the lip tie is causing problems with breastfeeding or other issues, then further treatment may be necessary.

The second option is to use exercises and stretches to help loosen the lip tie. This can be done by gently stretching the lip away from the gum and holding it for a few seconds. This should be done several times a day. Additionally, massaging the area can help to loosen the tissue.

The third option is to use a laser to release the lip tie. This is a relatively new procedure and is considered to be the most effective treatment for infant lip tie. During the procedure, a laser is used to cut the tissue connecting the lip to the gum. This procedure is usually done in a doctor’s office and is considered to be safe and effective.

Finally, the fourth option is to use a frenectomy. This is a surgical procedure in which the tissue connecting the lip to the gum is cut. This procedure is usually done in a hospital or clinic and is considered to be safe and effective.

These are the four options available to parents and caregivers for treating infant lip tie. It is important to discuss these options with a doctor or healthcare provider to determine which option is best for your baby. With the right treatment, infant lip tie can be successfully treated and any associated issues can be resolved.

Conclusion

infant lip tie is a common condition that can cause a variety of oral issues in babies. It is important for parents and healthcare providers to be aware of the signs and symptoms of lip tie in order to recognize and address the issue as soon as possible. With proper diagnosis and treatment, lip tie can be corrected and the baby can go on to have a healthy and happy life.

Azithromycin 250 mg Para Que Sirve: Usos y Consideraciones

Azithromycin 250 mg es un antibiótico de amplio espectro que se usa para tratar una variedad de infecciones bacterianas. Está disponible en forma de tabletas, cápsulas, suspensión líquida y polvo para preparar una suspensión líquida. Está disponible sin receta médica y se usa para tratar infecciones del tracto respiratorio superior, infecciones de la piel, infecciones del tracto urinario y enfermedades de transmisión sexual. Algunas consideraciones importantes a tener en cuenta al tomar azitromicina 250 mg incluyen el hecho de que no se debe tomar con alimentos ricos en calcio, que puede causar efectos secundarios como náuseas, vómitos y diarrea, y que no se debe usar durante el embarazo a menos que el beneficio potencial supere el riesgo para el feto.

¿Cómo puede ayudar el azitromicina 250 mg para tratar enfermedades? Exploramos los usos y consideraciones de este medicamento

El azitromicina 250 mg es un medicamento comúnmente usado para tratar una variedad de enfermedades. Está disponible en forma de comprimidos, cápsulas, suspensión líquida y polvo para preparar una suspensión líquida. Está aprobado por la Administración de Alimentos y Medicamentos de los Estados Unidos (FDA) para tratar infecciones bacterianas, como la neumonía, la bronquitis, la infección de la piel, la faringitis estreptocócica y la clamidia.

El azitromicina 250 mg también se usa para prevenir la enfermedad de Lyme y la malaria. Está disponible sin receta médica para tratar infecciones leves, como el acné. Sin embargo, para tratar infecciones más graves, se requiere una receta médica.

Es importante seguir las instrucciones de su médico al tomar el azitromicina 250 mg. Esto incluye tomar el medicamento exactamente como se indica, a la misma hora cada día. Si olvida una dosis, tome la dosis tan pronto como se acuerde. No tome una dosis doble para compensar la dosis olvidada.

Es importante tener en cuenta que el azitromicina 250 mg puede causar efectos secundarios, como náuseas, vómitos, diarrea, dolor de estómago y dolor de cabeza. Si experimenta alguno de estos efectos secundarios, comuníquese con su médico de inmediato. También es importante informar a su médico si está embarazada o amamantando, ya que el azitromicina 250 mg puede ser perjudicial para el feto o el bebé.

¿Qué efectos secundarios puede tener el azitromicina 250 mg? Una mirada a los posibles efectos secundarios y cómo prevenirlos

La azitromicina 250 mg es un antibiótico comúnmente usado para tratar infecciones bacterianas. Aunque es generalmente seguro y bien tolerado, algunos pacientes pueden experimentar efectos secundarios. Estos incluyen náuseas, diarrea, dolor de estómago, vómitos, dolor de cabeza, erupciones cutáneas, fatiga, malestar general y dolor en el pecho. Si experimenta alguno de estos síntomas, debe comunicarse con su médico de inmediato.

Además, la azitromicina puede causar reacciones alérgicas graves, como dificultad para respirar, hinchazón de la cara, labios, lengua o garganta, y urticaria. Si experimenta alguno de estos síntomas, debe buscar atención médica de inmediato.

Para prevenir los efectos secundarios de la azitromicina, siga las instrucciones de su médico al tomar el medicamento. Tome la dosis completa recomendada, aunque se sienta mejor. No tome más de la dosis recomendada, ya que esto puede aumentar el riesgo de efectos secundarios. También es importante beber mucha agua para ayudar a prevenir la diarrea.

Si experimenta alguno de los efectos secundarios mencionados anteriormente, comuníquese con su médico de inmediato. Su médico puede recomendarle cambiar la dosis o cambiar a un medicamento diferente.

Conclusion

En conclusión, Azithromycin 250 mg es un medicamento eficaz para el tratamiento de muchas infecciones bacterianas. Está disponible en forma de tabletas, cápsulas, suspensión líquida y polvo para preparar una suspensión líquida. Se debe tomar con precaución, ya que puede causar efectos secundarios graves. Se recomienda hablar con un médico antes de tomar este medicamento para asegurarse de que sea seguro para usted.

Back Oblique Muscle: Anatomy and Exercises for a Strong Core

The back oblique muscles are an important part of the core muscles that help to stabilize the spine and provide support for the body. They are located on the sides of the torso and run diagonally from the lower ribs to the pelvis. The back oblique muscles are responsible for rotation and side bending of the trunk, as well as providing stability during activities such as running and jumping. Strengthening these muscles can help to improve posture, reduce back pain, and improve overall core strength. In this article, we will discuss the anatomy of the back oblique muscles, as well as exercises that can be used to strengthen them.

How to Strengthen Your Back Oblique Muscles for a Strong Core

Having strong back oblique muscles is essential for a strong core. The core muscles are the foundation of the body and are responsible for providing stability and balance. Strengthening the back oblique muscles can help improve posture, reduce back pain, and improve overall performance.

The back oblique muscles are located on the sides of the torso and are responsible for rotating the torso and stabilizing the spine. To strengthen these muscles, it is important to perform exercises that target them specifically. Here are some exercises that can help strengthen the back oblique muscles:

1. Side Plank: This exercise is great for targeting the back oblique muscles. To perform the side plank, start by lying on your side with your feet stacked and your elbow directly beneath your shoulder. Lift your hips off the ground and hold the position for 30 seconds. Repeat on the other side.

2. Russian Twist: This exercise is great for targeting the back oblique muscles. To perform the Russian twist, start by sitting on the floor with your knees bent and your feet flat on the ground. Hold a medicine ball or weight in both hands and twist your torso from side to side. Make sure to keep your back straight and your core engaged.

3. Woodchopper: This exercise is great for targeting the back oblique muscles. To perform the woodchopper, start by standing with your feet shoulder-width apart and your arms extended in front of you. Bend your knees and twist your torso to one side while bringing your arms down and across your body. Return to the starting position and repeat on the other side.

By performing these exercises regularly, you can strengthen your back oblique muscles and improve your core strength. Remember to always use proper form and technique when performing any exercise to ensure safety and maximize results.

Anatomy of the Back Oblique Muscles: What You Need to Know

The back oblique muscles are an important group of muscles located in the trunk of the body. They are responsible for providing stability and movement to the trunk and spine. Understanding the anatomy of the back oblique muscles is essential for anyone interested in maintaining a healthy back and spine.

The back oblique muscles are located on either side of the spine and are divided into two groups: the external obliques and the internal obliques. The external obliques are located on the outside of the trunk and are responsible for providing stability and movement to the trunk and spine. The internal obliques are located on the inside of the trunk and are responsible for providing stability and movement to the trunk and spine.

The external obliques are the larger of the two groups and are composed of four muscles: the rectus abdominis, the external oblique, the internal oblique, and the transversus abdominis. The rectus abdominis is the most superficial of the four muscles and is responsible for flexing the trunk and spine. The external oblique is located beneath the rectus abdominis and is responsible for rotating the trunk and spine. The internal oblique is located beneath the external oblique and is responsible for rotating the trunk and spine in the opposite direction. The transversus abdominis is located beneath the internal oblique and is responsible for compressing the abdomen.

The internal obliques are the smaller of the two groups and are composed of three muscles: the internal oblique, the transversus abdominis, and the quadratus lumborum. The internal oblique is located beneath the external oblique and is responsible for rotating the trunk and spine in the opposite direction. The transversus abdominis is located beneath the internal oblique and is responsible for compressing the abdomen. The quadratus lumborum is located beneath the transversus abdominis and is responsible for stabilizing the spine and providing movement to the trunk.

Understanding the anatomy of the back oblique muscles is essential for anyone interested in maintaining a healthy back and spine. Knowing the location and function of these muscles can help you to identify any potential issues and take steps to prevent them. Additionally, strengthening these muscles can help to improve posture, reduce back pain, and improve overall health.

Conclusion

The back oblique muscles are an important part of the core and are essential for maintaining good posture and stability. Strengthening these muscles can help to improve posture, reduce back pain, and improve overall core strength. There are a variety of exercises that can be used to target the back oblique muscles, including planks, side bends, and Russian twists. With regular practice, these exercises can help to strengthen the back oblique muscles and improve overall core strength.

Understanding Acne Causes and Prevention Tips

Acne is a common skin condition that affects people of all ages. It can be embarrassing and uncomfortable, but it is also very treatable. Understanding the causes of acne and how to prevent it can help you keep your skin healthy and clear. This article will provide an overview of the causes of acne and some tips for prevention. We will also discuss the different types of acne and treatments available. By understanding the causes and prevention of acne, you can take steps to keep your skin looking its best.

Exploring the Different Types of Acne and Their Causes

Acne is a common skin condition that affects people of all ages. It is characterized by the appearance of pimples, blackheads, whiteheads, and other blemishes on the face, neck, chest, back, and shoulders. While acne is often associated with teenagers, it can affect people of any age.

There are several different types of acne, each with its own causes and treatments. The most common types of acne are:

• Whiteheads: Whiteheads are small, white bumps that form when a pore is clogged with oil, dirt, and bacteria. They are usually found on the face, neck, chest, and back.

• Blackheads: Blackheads are small, dark bumps that form when a pore is clogged with oil, dirt, and bacteria. They are usually found on the face, neck, chest, and back.

• Papules: Papules are small, red bumps that form when a pore is clogged with oil, dirt, and bacteria. They are usually found on the face, neck, chest, and back.

• Pustules: Pustules are large, red bumps that are filled with pus. They are usually found on the face, neck, chest, and back.

• Cysts: Cysts are large, painful bumps that are filled with pus. They are usually found on the face, neck, chest, and back.

The causes of acne vary depending on the type. Whiteheads, blackheads, and papules are usually caused by excess oil production, clogged pores, and bacteria. Pustules and cysts are usually caused by a combination of excess oil production, clogged pores, and bacteria.

It is important to understand the different types of acne and their causes in order to properly treat them. If you are experiencing any of the above types of acne, it is best to consult a dermatologist for proper diagnosis and treatment.

The Role of Diet and Lifestyle in Acne Prevention: Tips for Healthy Skin

Acne is a common skin condition that affects millions of people around the world. While there is no one-size-fits-all solution to preventing acne, there are certain lifestyle and dietary changes that can help reduce the risk of developing it. This article will provide tips on how to maintain healthy skin and reduce the risk of acne.

First and foremost, it is important to maintain a healthy diet. Eating a balanced diet that is rich in fruits, vegetables, and whole grains can help keep skin healthy and reduce the risk of acne. Additionally, avoiding processed foods and sugary snacks can help reduce inflammation and keep skin clear. Eating foods that are high in antioxidants, such as berries, can also help protect skin from damage caused by free radicals.

It is also important to stay hydrated. Drinking plenty of water throughout the day can help flush out toxins and keep skin hydrated. Additionally, avoiding caffeine and alcohol can help reduce inflammation and keep skin clear.

In addition to diet, lifestyle changes can also help reduce the risk of acne. Getting enough sleep is essential for healthy skin, as it helps the body to repair itself and reduce stress. Additionally, exercising regularly can help reduce stress and improve circulation, which can help keep skin clear.

Finally, it is important to practice good skin care habits. Washing the face twice a day with a gentle cleanser can help remove dirt and oil that can clog pores and lead to acne. Additionally, using a moisturizer can help keep skin hydrated and reduce the risk of breakouts.

By following these tips, you can help reduce the risk of developing acne and maintain healthy skin. Eating a balanced diet, staying hydrated, getting enough sleep, exercising regularly, and practicing good skin care habits can all help keep skin clear and reduce the risk of acne.

Conclusion

In conclusion, understanding the causes and prevention tips of acne can help you take the necessary steps to reduce the severity of your acne. It is important to remember that everyone’s skin is different and what works for one person may not work for another. It is also important to consult with a dermatologist if your acne persists or worsens. With the right knowledge and treatment, you can have clear, healthy skin.

Torn Pectoral Muscle: Understanding Chest Muscle Injuries

A torn pectoral muscle is a serious injury that can cause significant pain and disability. It is important to understand the anatomy of the chest muscles and the causes of this injury in order to properly diagnose and treat it. This article will provide an overview of the anatomy of the chest muscles, the causes of a torn pectoral muscle, and the treatment options available. It will also discuss the importance of seeking medical attention if you suspect you have a torn pectoral muscle.

What Causes a Torn Pectoral Muscle and How Can It Be Prevented?

A torn pectoral muscle, also known as a pectoralis major tear, is a common injury among athletes, particularly those who participate in weightlifting, football, and other contact sports. It occurs when the muscle fibers in the chest are stretched beyond their normal range of motion, resulting in a partial or complete tear.

The most common cause of a torn pectoral muscle is overstretching the muscle during a strenuous activity. This can occur when a person lifts a heavy weight or performs a sudden, forceful movement, such as throwing a ball. Other causes of a torn pectoral muscle include direct trauma to the chest, such as a blow from a blunt object, or a fall onto the chest.

To prevent a torn pectoral muscle, it is important to warm up and stretch before any strenuous activity. This helps to increase flexibility and reduce the risk of injury. It is also important to use proper form when lifting weights and to avoid lifting weights that are too heavy. Additionally, it is important to wear protective gear when participating in contact sports.

If a person does experience a tear in their pectoral muscle, it is important to seek medical attention as soon as possible. Treatment typically involves rest, ice, compression, and elevation (RICE) to reduce swelling and pain. In some cases, surgery may be necessary to repair the muscle.

How to Diagnose and Treat a Torn Pectoral Muscle Injury

A torn pectoral muscle injury is a serious injury that can cause significant pain and limit mobility. It is important to diagnose and treat a torn pectoral muscle injury as soon as possible to reduce the risk of further damage and to ensure a full recovery.

Diagnosis

The first step in diagnosing a torn pectoral muscle injury is to consult a doctor. The doctor will perform a physical examination and may order imaging tests such as an X-ray or MRI to confirm the diagnosis. The doctor may also order blood tests to rule out other possible causes of the pain.

Treatment

Once the diagnosis is confirmed, the doctor will recommend a treatment plan. The treatment plan may include rest, ice, compression, and elevation (RICE) to reduce swelling and pain. The doctor may also prescribe anti-inflammatory medications to reduce inflammation and pain.

In some cases, physical therapy may be recommended to help strengthen the muscles and improve mobility. The physical therapist may also recommend exercises to help improve range of motion and flexibility.

Surgery may be recommended in severe cases. The surgery will involve repairing the torn muscle and may also involve the use of a tendon graft to help strengthen the muscle.

Recovery

The recovery time for a torn pectoral muscle injury will depend on the severity of the injury and the treatment plan. It is important to follow the doctor’s instructions and to avoid activities that could cause further damage.

It is also important to allow the muscle to heal completely before returning to activities that involve strenuous use of the pectoral muscles. This may take several weeks or months depending on the severity of the injury.

A torn pectoral muscle injury can be a serious injury that requires prompt diagnosis and treatment. It is important to follow the doctor’s instructions and to allow the muscle to heal completely before returning to activities that involve strenuous use of the pectoral muscles. With proper diagnosis and treatment, a full recovery is possible.

Conclusion

Torn pectoral muscles can be a painful and debilitating injury, but with proper diagnosis and treatment, they can be managed and healed. It is important to seek medical attention if you experience any pain or discomfort in your chest area, as this could be a sign of a more serious injury. With the right care and rehabilitation, you can return to your normal activities and enjoy a full recovery.